EXE: How to Repair OneNote 2016, 2013, 2010 to Fix the Add-ins Errors?
Sometimes there are some problems when the Add-ins are working in OneNote 2016, 2013, and 2010.
On the face, OneNote 2016, 2013, 2010 itself is working normally, it seems to be no problem, but there are actually some problems inside OneNote, which causes the add-ins to be unhealthy.
Because of too many such problems, Gem for OneNote v55 now provides a feature in Gem Fix Tools, to focus on fixing these persistent problems inside OneNote 2016, 2013, 2010.
Step 1: Open Gem Fix Tools
Run the Gem Fix Tools of Gem for OneNote from Windows Start Menu.
Run the Gem Fix Tools of Gem for OneNote from Windows Start Menu.
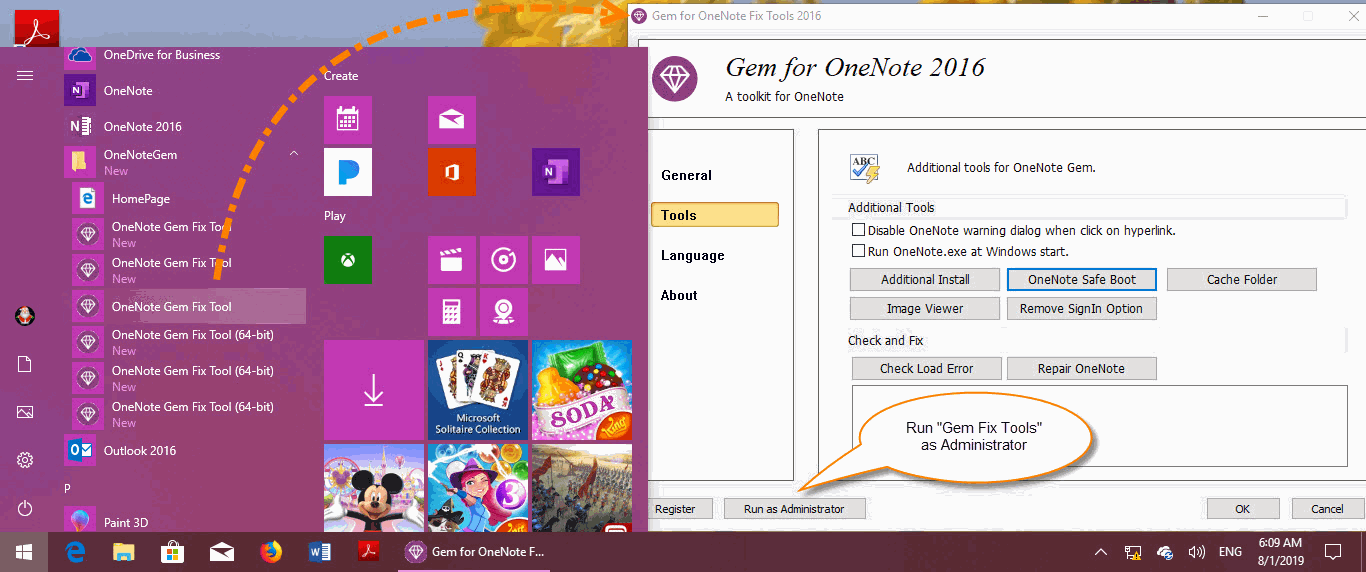
Step 2: Run Gem Fix Tools as Administrator
Click the “Run as Administrator” button on the left bottom of Gem Fix Tools, it will run Gem Fix Tools as administrator privilege.
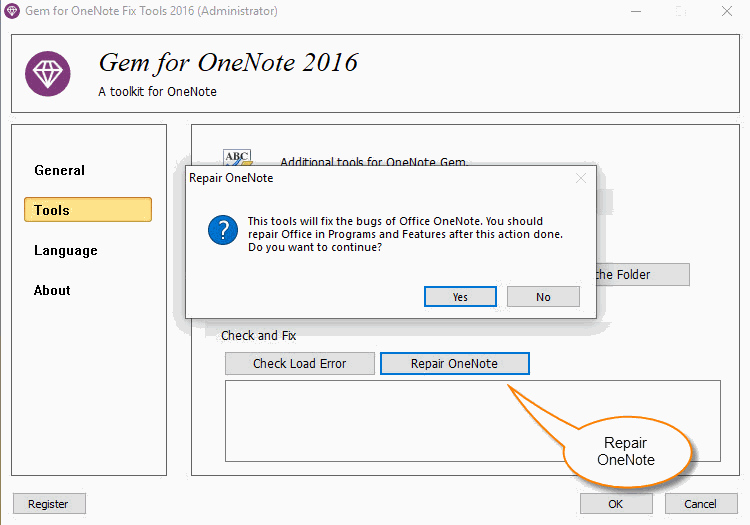
Step 3: Click “Repair OneNote” Button
Then, in Gem Fix Tools, click “Tools” tab -> Click “Repair OneNote” button.
Because the repair process cannot be rolled back. At this point, a pop-up window is raised to ask if you want to continue. Press Yes to continue.
Click the “Run as Administrator” button on the left bottom of Gem Fix Tools, it will run Gem Fix Tools as administrator privilege.
Step 3: Click “Repair OneNote” Button
Then, in Gem Fix Tools, click “Tools” tab -> Click “Repair OneNote” button.
Because the repair process cannot be rolled back. At this point, a pop-up window is raised to ask if you want to continue. Press Yes to continue.
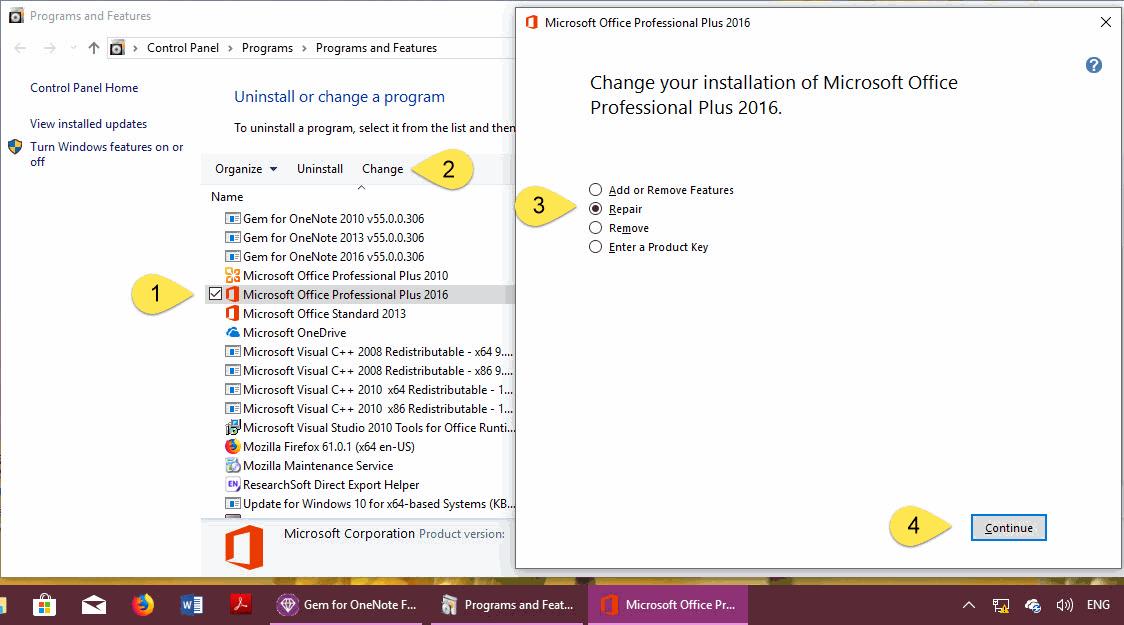
Step 4: Repair Office in “Programs and Features” of Control Panel
After Gem Fix Tools repair completely, it will open “Programs and Features” of Windows Control Panel.
In Programs and Features:
After Gem Fix Tools repair completely, it will open “Programs and Features” of Windows Control Panel.
In Programs and Features:
- Choose Office.
- Click "Change" on above. It will launch the installer of Office.
- Choose “Repair” option in Installer of Office.
- Finally, click the “Continue” button on the bottom of Office installer. It will start to repair Office.
Step 5: Restart Computer
At last, restart computer to complete repair OneNote 2016, 2013, 2010.
At last, restart computer to complete repair OneNote 2016, 2013, 2010.