How to Password Protect Current OneNote Notebook?
We have known that OneNote has provided "Password Protect this Section" feature. This feature just support using password to protect a section. And OneNote don't provide using password to protect notebook.
Gem's Password Protect Current Notebook
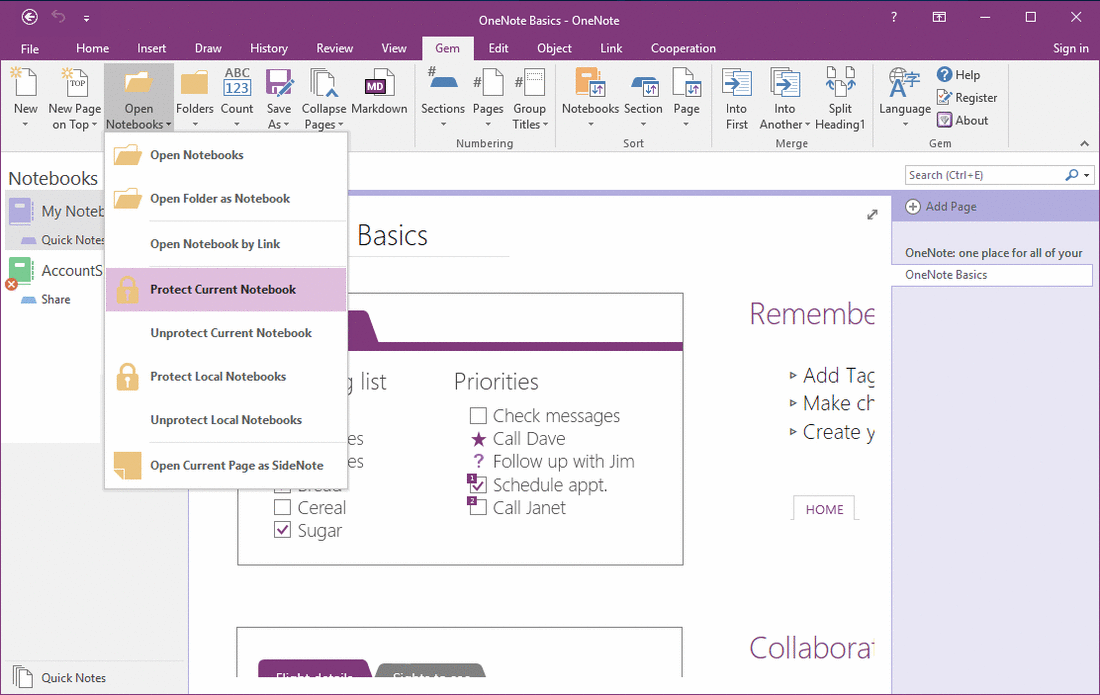
Gem for OneNote 34 add new feature "Protect Current Notebook" to using password to protect your current entire notebook (include all section groups and sections).
You can find it on "Gem" tab -> "Open Notebooks" menu -> "Protect Current Notebook".
Gem's Password Protect Current Notebook
Gem for OneNote 34 add new feature "Protect Current Notebook" to using password to protect your current entire notebook (include all section groups and sections).
You can find it on "Gem" tab -> "Open Notebooks" menu -> "Protect Current Notebook".
Protect Current Notebook on Right Click Menu
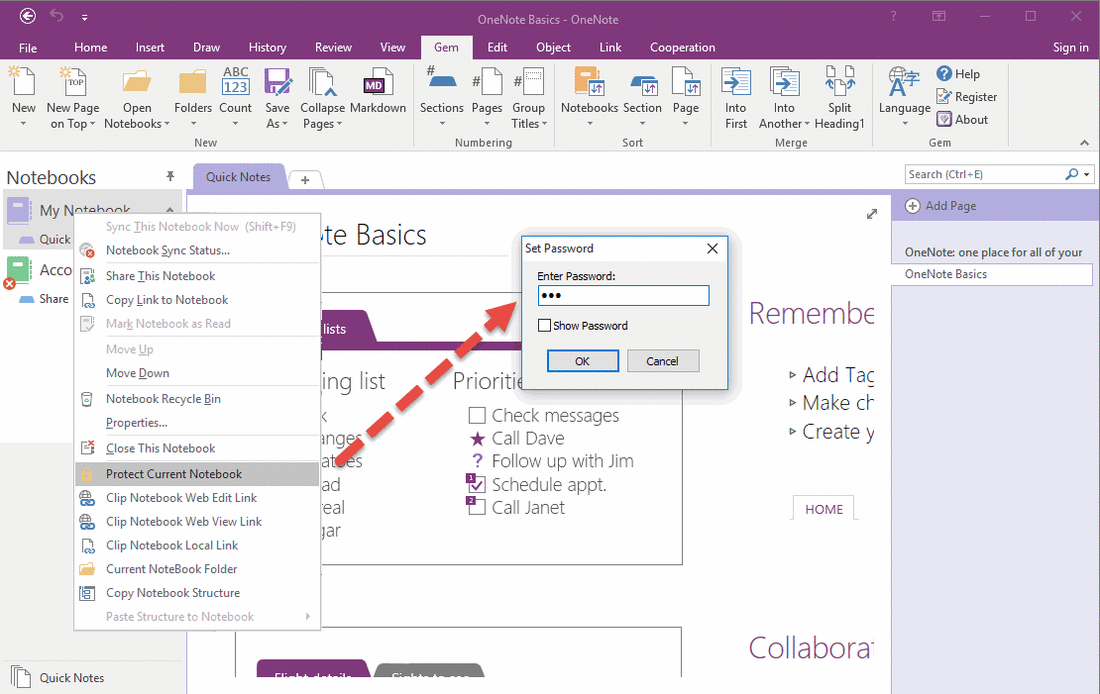
You also can find this feature "Protect Current Notebook" on notebook's right-click menu.
"Protect Current Notebook" will pop up a "Set Password" window, you can input password here.
Warning: Please remember your password. If you lose or forget the password, Gem cannot recover your data. (Password are case-sensitive).
Notebook After Protected
After input password, and click "OK" button, Gem will start protect current notebook.
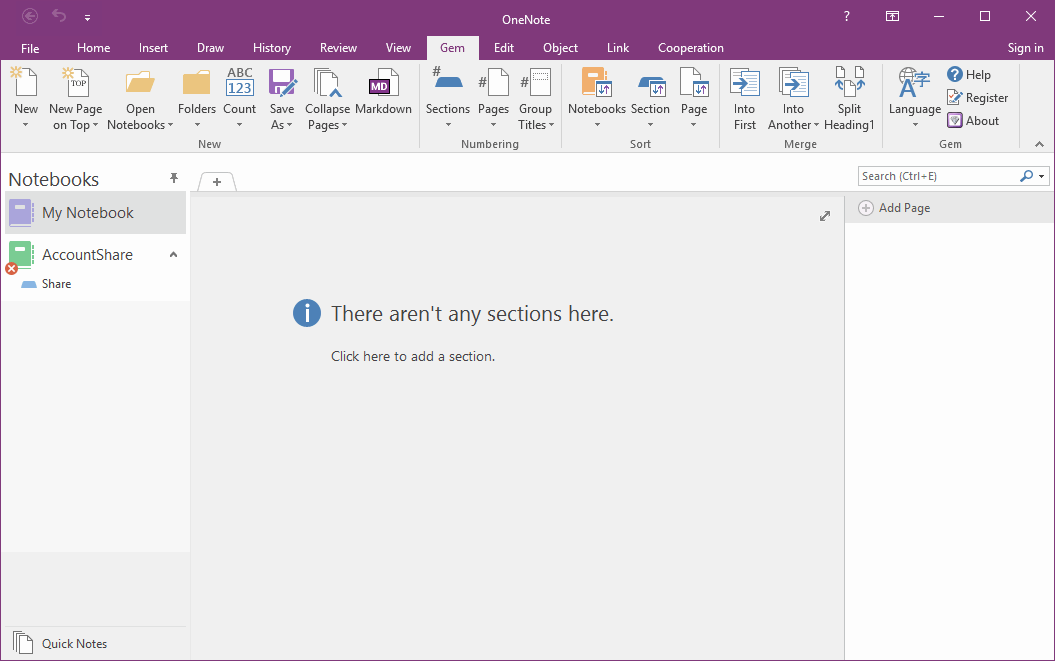
After Gem protect notebook successfully, the notebook will be shown
There aren't any sections here.
Click here to add a section.
After input password, and click "OK" button, Gem will start protect current notebook.
After Gem protect notebook successfully, the notebook will be shown
There aren't any sections here.
Click here to add a section.
Unprotect Current Notebook
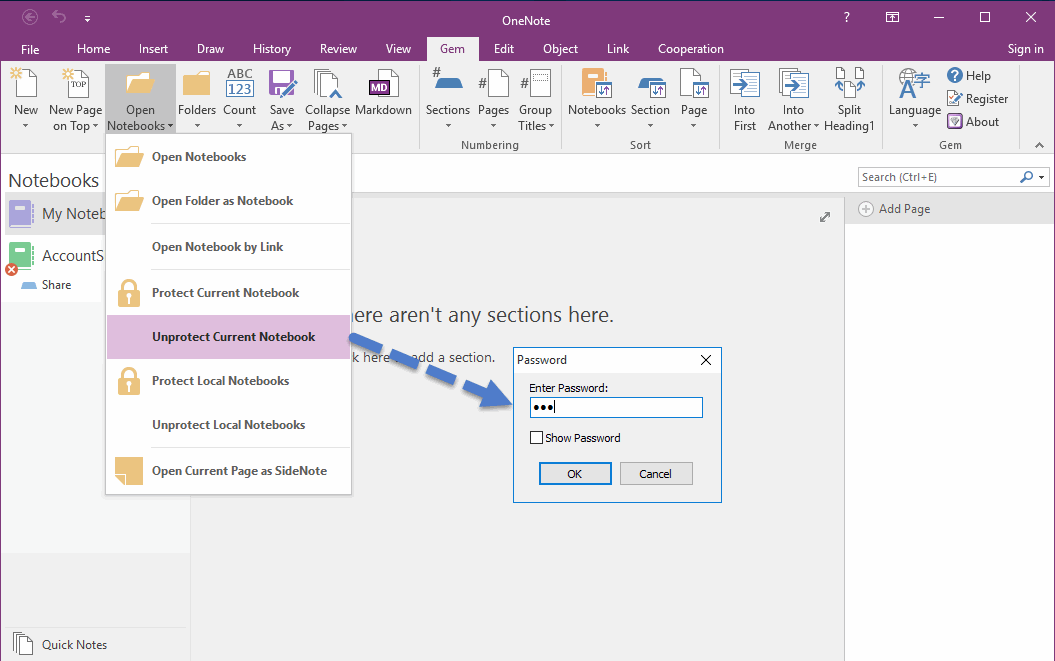
To recover the "Protected Notebook", you need "Unprotect Current Notebook" feature.
Follow "Gem" tab -> "Open Notebooks" menu -> "Unprotect Current Notebook".
It will pop up a "Password" window.
In here, you can input password to unprotect notebook.
To recover the "Protected Notebook", you need "Unprotect Current Notebook" feature.
Follow "Gem" tab -> "Open Notebooks" menu -> "Unprotect Current Notebook".
It will pop up a "Password" window.
In here, you can input password to unprotect notebook.
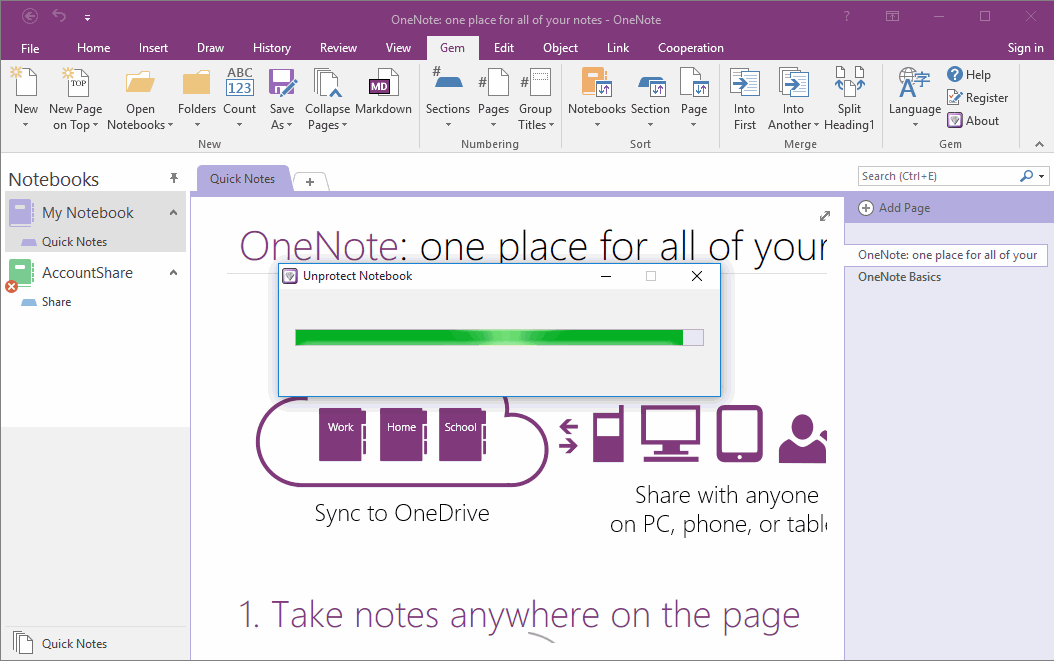
Unprotect Notebook and Recover the Pages
After wait a few while. You can get back the pages in current notebook.
After wait a few while. You can get back the pages in current notebook.
Warning: "Protect Current Notebook" feature just support local notebook only.
